HOW TO GROW GARLIC
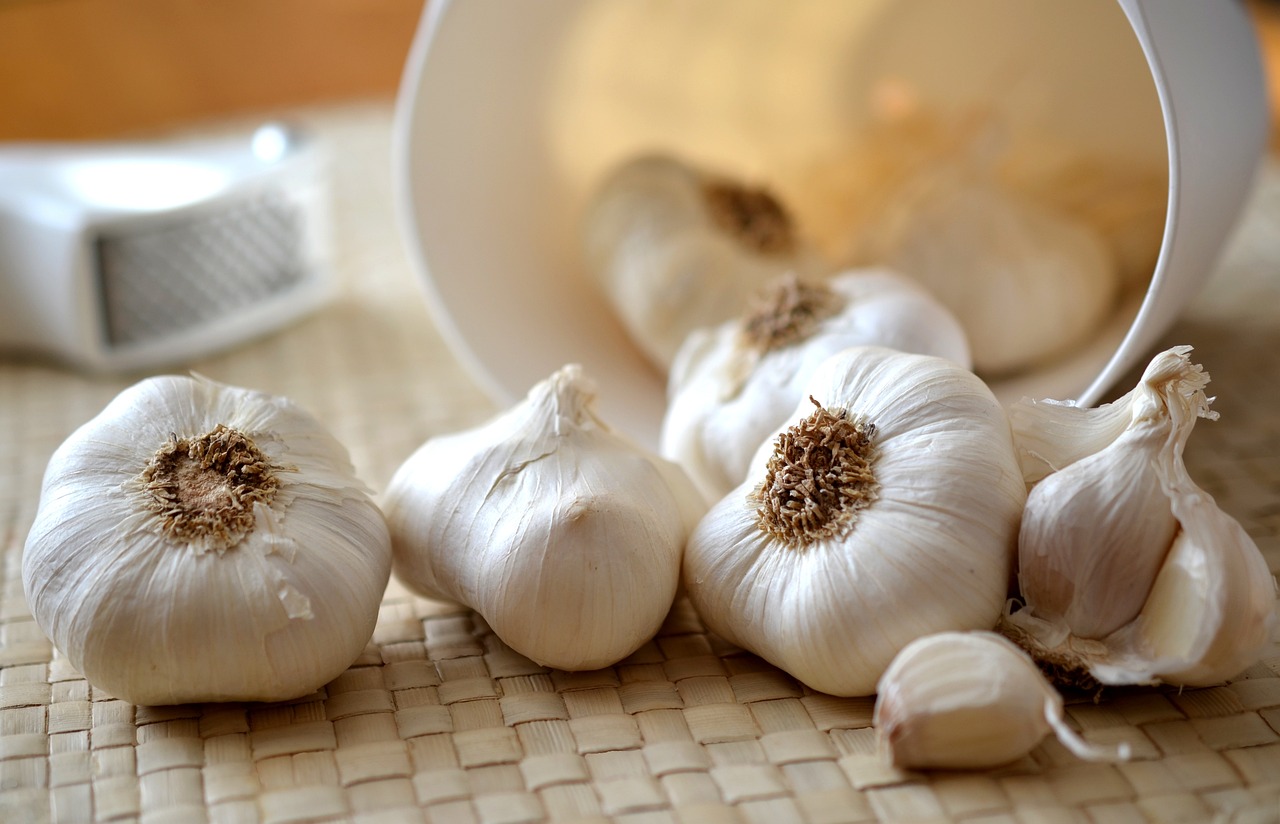
OH, GARLIC - WE LOVE YOU!
Spicy, warm, buttery, delicious, nutritious; our favorite spice, snack, and food. You can fry it, dry it, sauté it, boil it in soup, mash it in dip, and much more. It almost seems like garlic and people were meant to be!
Maybe that is because we have been together for so long! Garlic is one of the oldest known horticultural crops in the world and was referred to by the ancient Egyptian and Indian cultures over 5000 years ago. There is evidence for its use in Babylonia 4500 years ago, and some writings suggest that it was grown in China as far back as 4000 years ago. Garlic’s center of origin and the only place where true garlic (Allium Sativum) grows in the wild today is Central Asia. Humans, who couldn’t resist the versatility and flavor of garlic, began to cultivate it all over the world.
If you love garlic as much as we do, you have come to the right page! We are going to tell you all about growing your own garlic at home! Let’s begin!
TYPES OF GARLIC
HARDNECK & SOFTNECK GARLIC
Although Ancient cultivators of garlic did not begin to distinguish between types until around one thousand years ago, nowadays garlic is divided into two types: hardnecks and softnecks.
Hardneck garlic (Allium sativum var. ophioscorodon) typically produce a tall, woody, flowering stalk called a scape. The scapes extend, grow, and coil during early growth, and then straighten out as the plant matures.2 In some types, these scapes grow small bulbils at the top. If the plant is allowed to put its energy into these seeds, the bulb forming below the ground will end up smaller in size. To avoid this, cut the seed stalks off as soon as the flower head has reached 8-9 inches tall. Each hardneck bulb typically contains 4-10 cloves. Although the bulbs have fewer cloves than in softneck varieties, the cloves are generally larger, and hardneck garlic enthusiasts claim they are spicier and more pungent than softneck cloves.2 Hardnecks are more cold-hardy than softnecks, and their many varieties can be grouped into three types: Rocambole, Porcelain, and Purple Stripe.3 Hardnecks store well for 3-6 months.
Softnecks (Allium sativum var. sativum) typically do not produce scapes and have a softer stem than hardnecks, making them suitable for braiding.
Softnecks are separated into 2 different types, Silverskin and Artichoke, and are more commonly found in grocery stores because of their long shelf life of 6-9 months.
They produce larger bulbs with 10-20 cloves, although the cloves are smaller than those of a hardneck variety.
Softneck garlic has a milder flavor than hardneck garlic and are more suitable for warmer climates.
ELEPHANT GARLIC (Allium ampeloprasum)
is not a true garlic, but rather a leek that produces large cloves.2 You may find it available when purchasing your garlic bulbs for growing. Elephant Garlic also produces a large scape and bulbils like Hardnecks do and has the mildest flavor of the three types.2
Keep these classifications in mind when choosing the garlic you will plant! There are many different special varieties of each type of garlic. Your local extension will probably list the best types for your area, and your local garden center should carry these varieties as well. In general, keep in mind hardnecks are more cold-hardy, and softnecks need a milder winter. Once you have determined which type is most suitable for your climate, you can choose varieties based on your culinary preferences!
WHEN TO PLANT
Garlic can survive bitterly cold winters underground (or grows frost-hardy leaves where winters are mild to moderate). It is best to plant garlic in Fall, as this produces larger bulbs for harvest, but you can also plant in early Spring.
In areas with milder winters, garlic is planted from September through early November. In the North, or areas with harsher winter temperatures, make sure to plant garlic 4-6 weeks before the ground freezes. This will ensure the plant has plenty of time for root development, but not enough to produce too many leaves, which could be damaged by the harsh winter weather. If your plant experiences frost damage it can affect the bulb size later on, so make sure to trim them back if the leaves reach over 4″. You can check in with your local extension office, to find the best planting time for you.
Once the weather begins to warm in the Spring garlic will grow rapidly, and the bulbs should be ready for harvest in the Summer. Garlic bulbs will generally be labeled as late, early, or mid-season when you purchase them, which indicates what time they will be ready to harvest.
HOW TO CULTIVATE GARLIC
SITE SELECTION AND SOIL PREPERATION
Garlic requires full sun, rich, well-draining soil, and little competition from weeds.
Garlic needs fertile soil with a lot of organic matter so that the soil remains loose through the long growing season. Growers with heavy clay soils should add a lot of compost before planting. If you have naturally looser soil, you only need to add small amounts of organic matter or grow and till in green manures (cover crop) prior to planting.
Like onions, garlic cannot tolerate competition from weeds. If growing directly in the ground, make sure the area you select is well-weeded prior to planting. Otherwise, plant garlic in containers or raised garden beds. Some of your garlic roots will be near the surface, so you risk damaging them and hindering yields if you have to weed later in the season. If anything, use a very sharp hoe to shallowly and carefully scrape away any weeds.
HOW TO PLANT GARLIC
Break the bulb into individual cloves and choose the largest ones. Small cloves usually grow small bulbs, so use the small cloves in your kitchen. If you are planting a Hardneck variety, you can break the cloves apart by gripping the bulb in your hand and striking the top of the hard center stalk on a counter or hard surface. Make sure not to do this upside down or else you risk damaging the basal plate of the cloves. Also take care not to remove the skin around each clove. This will increase the likelihood that the clove rots in the ground before it has the chance to sprout. If you accidentally remove the skin of a clove, you will be better off using that one in your kitchen as well. Think of it as a taste test!
Depending on your climate, make a small hole 2-4’ deep. In areas with milder winters, you can place your cloves with the tips just an inch under the surface. In areas with the harshest of winters, you may need to plant them with the tips 3’ under the surface, to provide more protection from Winter temperatures. You don’t want to plant your cloves too deep, as this will cause your garlic to waste valuable energy trying to get to the surface.
Garlic has an expansive root system that can reach up to 3 feet below the surface. You need to provide adequate spacing between your plants in order to get the best harvest. Plant the cloves at least 4 inches apart but remember that more space between plants will increase the size of the bulbs. In raised beds where space is an issue, you can plant 3-4’ apart in rows that are 6-8 inches apart.2 If you are dealing with a container garden, try to maintain this spacing and make sure that your pot is at least a foot deep, and ideally 18’ or deeper. Make sure to use a marking system to label each type of garlic you grow.
You will want to fertilize the area under your cloves when you plant them. You can apply 1 Tbsp of Rock Phosphate, Bone Meal, or Fish Bone Meal as well as 1 Tbsp of Kelp Meal or Azomite under each clove. Alternatively, you could apply 1 Tbsp per clove of one of our complete mixes like our Rose and Flower Mix or Vegan Mix. This initial high Phosphorous fertilization will give your garlic the good head start it needs to establish healthy roots to survive the winter.
Additionally, it is said that sulfur might increase the pungency and spice of garlic, so you could apply 1 Tbsp of our Garden Gypsum under each clove when planting as well!
After you cover the bulbs with soil, mulch with organic material like compost, newspaper layered with straw, grass clippings, shredded leaves, or whatever else you prefer. A deeper mulch layer will better protect against a harsh winter, so aim for about 2-6 inches depending on your zone. This layer of mulch will also help with weed prevention.
This year we planted 3 garlic cloves per 10-gallon pot and 1 clove per 3-gallon pot and applied our Bone Meal, Kelp Meal, and Garden Gypsum. We initially mulched with a thin layer of leaves but will add a thicker mulch for the winter as the temperatures begin to drop.
We spaced these cloves 3 inches apart and planted at a depth of 2'
We used 1 Tbsp each of our Bone Meal and Kelp Meal under each clove, as well as 1/2 Tbsp of Garden Gypsum
We added a very thin layer of leaves to begin with, and will add a deeper mulch as the weather gets colder
Watering
Even in the dry West, garlic needs little irrigation as it grows mainly during the wet season, although some irrigation may be necessary for dry spells. You should water with your initial planting, and possibly one more time before the Winter if your soil gets too dry.
Once active Spring growth occurs, your garlic needs about an inch of water each week. You can stop watering in early June when the leaves begin to yellow and let the bulbs firm up. For a hardneck variety, you should only need to water once more after cutting off the scapes.
HARVESTING GARLIC
Even for a seasoned gardener, it can be tricky to figure out the right time to harvest their garlic. Gauging the right time to harvest is very important! If you dig the bulbs up too soon, the skins won’t have formed around each clove. Meanwhile, if you harvest your Hardneck bulbs too late, they may have begun to spread apart in the soil and will not store well for the winter. Don’t sweat it too much though! There are a lot of tools and tricks you can use to figure it out. Each year the timing is a little different, so rather than watch the calendar, observe the plants.
Firstly, make sure to keep the information on which varieties of garlic you planted. There should be an indicator of general harvest time, as each variety will be labeled Early Season, Mid-Season, and Late Season. For example, California Early is a variety that, you guessed it, is an Early Season Harvest.
Now that you know the general time of the season your garlic will be ready to harvest, you can check in on the other clues. The state of the garlic’s foliage is the best indicator for harvest, not any particular date.
As mentioned above, you can stop watering your hardnecks after cutting the scapes off and start thinking about harvesting. As softneck or hardneck bulbs mature, the visible parts of leaves will start to brown off. Each plant will have 6-9 leaves, which extend down below the soil to wrap around the bulbs and form the papery skin of the cloves. When the lower 2-3 leaves start to yellow and brown it is nearly time to harvest! But hold on: wait until the top leaves also have yellow and brown tips. The bottom leaves may have already turned completely brown at this point, but don’t let that scare you! When around 1/3 of the leaves, including the lower ones, have brown or yellow on them, then it is time to harvest!4
The leaves of garlic beginning to yellow
Don’t sweat it if you pulled a little too soon or late. Any smaller cloves that haven’t fully matured can be chopped up like onions and used in cooking. Any bulbs that have matured too much and started to pull apart in the soil can still be used as well, they just won’t store for very long.
In very good soil the bulbs might be pulled by hand, but don’t do it without loosening the soil around the bulb with a spade or garden fork. Gently pull the bulbs from the soil and brush the soil from the roots.
DON’T WASH THE BULBS. Drying is the essential part of curing the bulbs, so immediately move the newly dug garlic out of direct sunlight. Then it is time to cure!
CURING GARLIC
Properly curing (drying) your garlic, is essential for proper storage. You want to be able to enjoy your harvest until the next one comes right?
There are a few ways to do this. Some growers tie the garlic plants by their leaves or stalks in loose bundles of 8-12 plants and hang them undercover. Others spread the plants in single layers on screens, drying racks, or slatted shelves. Softneck garlic can be braided together for efficient curing and aesthetic storage! You can attach your wooden plant marker or a label to bunches, or drying racks to keep track of your different varieties. Try not to damage the papery skin while using these methods, and NEVER wash your garlic until you are ready to eat it.
Good air circulation is absolutely essential: excess moisture can cause your garlic to rot. The plants should cure from 3 weeks to 2 months, depending on the humidity and amount of air circulation. Some growers use a fan in the curing shed.
After curing, you may trim the roots. If the garlic is to be kept in sacks, cut the stalks off 1/2 inch above the bulb and gently clean the bulbs with a soft bristle brush, taking care not to strip off the papery skin. You can save your biggest and best-formed bulbs for planting next year!
Make sure you store your garlic at room temperature, where it will stay very dry. Don’t put it in refrigeration, as this can induce sprouting. You don’t want to waste all your hard work getting it ready for storage! You can enjoy your garlic for 3-9 months depending on if you planted hardneck or softneck!
PESTS AND DISEASES
Garlic is fairly easy to grow and bothered by few pests, but there are still some you can watch out for!
Bulb mites feed exclusively on the bulbs of garlic, onion, tulips, and lilies. Dry bulb mites, Aceria tulipae, the main type of bulb mites that bother garlic, measure less than a millimeter and look like tiny curled worms. They spend the winter inside stored cloves, or in the ground with fall-planted garlic. There are also mites of the Rhizoglyphus genus, most particularly R. echinopus, which aren't visible to the naked eye, look like squishy, damp pearls and have 8 legs, under a microscope. Twisted, stunted leaves and failure to develop are all a result of the damage being done by these mites and a sign that you have a mite infestation. You might not even notice they were there until you store the bulbs and they begin to rot. If you notice brown spots on the bulbs, you can guess that bulb mite were the culprits.
To avoid hosting a continuous infestation, rotate your allium crops. Don’t plant garlic in soil where alliums, corn, wheat, brassicas, or grasses were planted until 4 years have passed. All of these plants can play host to bulb mites. Do not reuse compost made from infected plants.
Soaking your seed cloves in water at 130 °F for 10 minutes before planting can help kill the pests. Don’t go over 132°F though, as that can damage the clove tissue.
You can also use a beneficial predatory insect like rove beetles, which feast on the mites.
A neem oil based insecticide may also do the trick.
Leafminers (Allium leafminers) are small yellow and black flies. These insects lay their eggs on the underside of the garlic leaves. The tiny white eggs hatch maggots that tunnel inside the leaves and eat the tissue. They can eventually tunnel all the way down into the bulbs and will leave curving squiggles and holes in the leaves and stalks.
If leaf miners are common to your area, install a floating cover over your garlic. If you see any signs of leafminers on the leaves, immediately remove and destroy the affected foliage.
Nematodes are another pest that are best prevented by rotating your crops. Don’t plant your garlic in areas that recently grew celery, parsley, hydrangea, flower bulbs, and alfalfa since nematodes eat these plants as well.
Garlic Bloat Nematodes are microscopic roundworms, which live in the soil, bulbs, stems and leaves of garlic. They cause the leaves to yellow and wilt, and the bulbs to swell and bloat. This makes your garlic susceptible to further damage by a fungal infection.
You can try soaking your seed clove at 120°F water for 20 minutes to pre-treat any affected cloves.
You can also release beneficial nematodes into your garden, or spray with a neem oil based organic insecticide. Do not reuse compost made from infected plants.
Onion Maggots are about 1 cm long and are spread by adult flies, which can travel up to 1 mile to find your garden! The eggs are laid in the soil around your plants. You can detect these flies by setting out sticky traps around your plants. If you catch a narrow-bodied humpbacked fly, you may have to watch out for maggots.
These pests can also be prevented and managed through crop rotation and the use of a floating row cover. If you prep your soil well, the loose well-draining soil will also be less appealing laying areas for the flies. Adding diatomaceous earth to the soil surrounding your plants can kill the larvae, and adding Rove beetles and nematodes can also control an infestation.
The maggots cannot survive if the soil temperature reaches 95°F, so you won’t need to worry if you have a warmer climate.
Thrips are by far the most common pest you will need to watch out for. Thrips suck the juice from leaves, giving them a silvery-streaked appearance.
You can keep your plants thrip-free by spraying the foliage with water: thrips like a hot, dry environment. You can also treat infestations with insecticidal soap, Spinosad, or neem oil spray.
FUNGAL INFECTIONS
There are a few common diseases of garlic to watch out for as well. White rot and basal rot are fungus infections that cause decay in the leaves and bulbs of garlic and are best prevented through crop rotation. Blue mold rot infects cloves with spores and prevents them from growing after you plant. This infection generally occurs in storage, so make sure not to damage or bruise your seed cloves. Leaf blight can infect your garlic plant and cause white lesions on the leaves if the environment becomes too humid. This can also be prevented by crop rotation, and rarely causes enough damage to warrant the use of a fungicide. Do not reuse compost made from infected plants.
BENEFICIAL INSECTS
For integrated pest management and bio-control of pests, the use of predatory and beneficial insects can help maintain a healthy garlic crop. Thrips, for example have many natural predators including green lacewings, ladybugs, parasitic wasps, minute pirate bugs, and beneficial nematodes. Parasitic wasps are a beneficial insect and are the bug of choice for controlling a thrip infestation. The Rove beetle is useful for controlling bulb mites. Many predatory insects such as lacewings, ladybugs and parasitic wasps are also good pollinators!
DISEASE AND PEST PREVENTION
Preventative care is the best step to avoid any diseases affecting garlic. You may not have to worry about pests or diseases at all during your growing season! In fact, the most common problem for garlic is root rot, which occurs from overwatering or poorly drained soil. Make sure you prep your soil carefully and follow a watering schedule. To maintain a healthy garlic crop, remember to always dispose of infected plant material, and don't reuse any compost that may contain plants showing signs of pest damage, or fungal infections.
The good news, is that deer are not attracted to garlic due to the strong odor.
This should be all the information you need to successfully plant, harvest, and cure your own garlic! You know all about the best site selection and soil preparation, fertilization and watering schedules, tips for harvesting, and ways to cure and store your delicious crop. You know how to prevent diseases and pests through crop rotation and preventative care, and how to treat these issues if they arise. You’re ready! Go plant your Garlic!
References:
Simon, Philipp W. “The Origins and Distribution of Garlic: How Many Garlics Are There?” USDA Agricultural Research Services. USDA, March 3, 2020. https://www.ars.usda.gov/midwest-area/madison-wi/vegetable-crops-resear….
“Allium Sativum ‘Music’.” Allium sativum ‘music’ – plant finder. Missouri Botanical Garden. Accessed November 4, 2021. https://www.missouribotanicalgarden.org/PlantFinder/PlantFinderDetails…;.
Hannan, Richard M., Washington State University, and Cooperative Extension. “Crop profile for garlic in Washington” (2001):
Forney, Julie Martens, Lynn Coulter, and Kelly Smith Trimble. “How to Grow, Plant and Care for Garlic.” HGTV. HGTV, February 5, 2021. https://www.hgtv.com/outdoors/flowers-and-plants/vegetables/how-to-grow….
Melchor, Laura Ojeda. “How to Identify and Control Garlic Pests.” Gardener’s Path, August 15, 2021. https://gardenerspath.com/how-to/disease-and-pests/control-garlic-pests/.